Search This Blog

Saturday, May 10, 2008

Ham Radio Qrp Tcvr Bitx. Hombrewed By Om Vittorio Bruni IOVBR


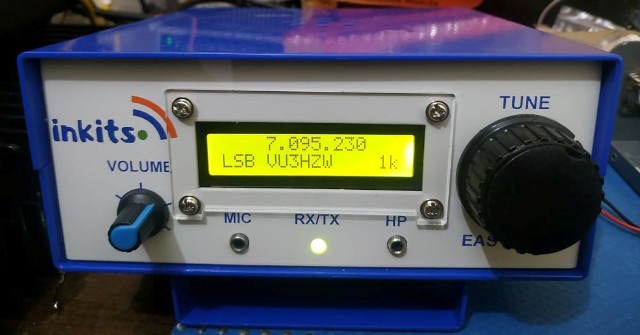
Our very good friend Vittorio Bruni IOVBR has sent us a very good picture of his Bitx Version 3 Tcvr. The Bitx looks excellent with a very nice construction work done. Hope we can get some
more good pictures from our friends who have home-brewed their Bitx.

Thanks Om Vittorio,we appreciate your hard work. There are many hams friends of Om Vittorio who have started building their Bitx. We welcome any pictures sent by friends,so that they can be posted on Cqbitx,the home for Bitx Version 3.

Saturday, April 26, 2008

Qrp Ham Radio Magazines


This post is being written to convey special thanks to my very good friend Vittorio Bruni IOVBR who has sent some very good and informative magazines on Ham Radio Qrp construction circuits.
Vittorio is has designed some very good circuits which are published in these magazines.

Thanks Vittorio and we appreciate your contribution to the Ham Radio World.

Bitx Qrp Tcv Modifications By IW1AXR, Daniel Cappa 2


The PCB layout of Bitx Board,board area is highlighted where you could modify and install the
recommended parts. Thanks Om IW1AXR, Daniel Cappa.


Thursday, April 24, 2008

Modifications Bitx Version 3 Qrp Tcvr By Om Daniel Cappa IW1AXR


Our Friend Vittorio has sent us modifications for the Bitx version 3 Qrp Tcvr.which his friends Om Daniel Cappa IW1AXR has made and contributions by IK1JNS, Pino Panniello, www.panniello.it . Q5 VfO transistor is now JFET BF245/2N3819 resulting in improved noise performance in this stage.
A single transistor stage has been added in the mic pre amp.Another transistor from one end of the volume control pot to ground mutes the AF amp in transmit. ZRF (RFC 100uh to 1mh) between audio stages and product detector/mod blocks any Rf from getting into audio stages.

Wednesday, April 23, 2008

Frequency Counter Construction Tips

The frequency counter construction requires some careful home brewing.The following points should be taken into consideration which will help you in constructing it and incorporating in your commercial or home brew TCVR,Receiver or Transmitter.

  1. A soldering Iron with a pointed bit should be used as the tracks on PCB are
    quite narrow.
  2. First Mount all the common cathode FND,solder them to the board,after that
    check the FND with a multimeter each point of FND,which should glow.Now this step insures that all your FND are working and properly installed on the PCB.
  3. Now mount the 7805,IN4148 and 220 ufd capacitor.After soldering it on the board,now connect 12Volts DC Supply and check if the 5 volt is being generated by your regulator stage.If its giving 5 Volts,then your second stage is completed.
  4. Now connect all the remaining components,leaving the Pic,which should be connected at the last step.
  5. After all components are mounted and soldered its time to mount the Pic base and solder it on the board,finally insert the Pic into its base,but do check the correct polarity of Pic.
  6. Check if all your jumpers are connected.
  7. Now Apply 12 volts again.The counter will start with all the FND illuminating,but will settle to one digit lighting to zero. This is the safe power mode.
  8. You can programe the Pic by going through the manual of the frequency counter.
  9. The small switch is used to programe the counter.
  10. After programming it connect the VFO of your rig with a suitable resistance,now you will get the frequency output.

Saturday, April 19, 2008

New Website Hamkits.in


HAMKITS.IN E-STORE FORUM BLOG


Finally I have launched a website,where all Hams can buy Kits that I will be offering at very reasonable prices and of good quality.

Hamkits.in is the new webite which I have launched. The site has an E-Store , Forum and a
Blog. The E-Shop is still under construction and the products will be added soon.

I request all my friends to create a account on the Hamkit.in Forum.
http://hamkits.in/forum/

Hopefully with the support of my friends Hamkits.in will reach a milestone in time to come.

Thursday, April 17, 2008

Comments For Packing And Quality Of Bitx Pcb

Lately I have shipped a number of Bitx Version 3 PCB and have got some very good comments from my friends who have purchased the Kits for the quality of packing and PCB.
I would like to invite my friends to make the comments right here on this blog.
A latest comment from my friend TODD NORTHOVER . G0TOD is being posted here.
"Thanks for your comments Todd"

Hi there Kit received very very well packed Boards and components as listed all there.

What an excellent service and Price too .

Some U.K Supplier,s should take a leaf out of your book.

Regards Todd G0TOD


After the excellent response for my kits the time has come to launch a website on Ham Kits.

Very shortly the website will be launched which will be having a shopping cart,blog and a forum,where all friends are requested to post any comments or discuss about Ham Radio in general. The website is under construction and will be open to members soon.


Featured Post

   My Journey with Amateur Radio: Sunil Lakhani (VU3SUA) Shares His Story Hello, fellow radio enthusiasts! This is Sunil Lakhani, also known...