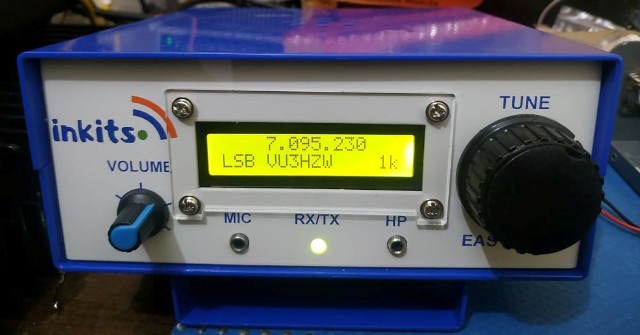
We are selling our BITX metal case in various colors, these can be used for our
bitx models like bitx3b 3c etc, these are also good for bitx 40 smd.
Explained below is the method of how you can mount the bitx 40 smd
using our bitx3b case as below.
STEP-1
Place the bitx 40 pcb in center of the 4 holes which are actually meant for the
bitx3b boards.
Now take a marker pen with a thin and long tip, and make circles inside
the pcb mounting holes and then make new 4 holes on all the 4 mounting holes with
a suitable drill. If you can not make holes yourself then ask a friend or seek professional help.
Mounting holes for BITX 40 board
Mounting holes for BITX 40 board
Screws secure on the brass spacers
STEP-2
In the second step we mount the bitx40 board on the brass stands and secure them with the nuts on
all four brass stands.
Bitx 40 board mounted on the bottom cover case
Bitx 40 board mounted on the bottom cover case
So in easy two steps we have mounted the Bitx 40 board on the metal case for our
bitx case.
If you do not wish to make holes on the case then there is a second option of cutting a piece
of copper board and mounting that on the bitx3b case on the pre drilled holes and after that making
4 holes for the bitx board on the copper sheet and mounting the bitx 40 board on the copper sheet with brass stand stands.
The advantage of using our case is that you get sufficient place for adding any other add on circuits
like audio mute control, agc and an extra linear amplifier.
Further we are coming out with some new models that should solve the drilling holes on the
case for bitx 40 smd.
Kindly note we are not in any way selling or servicing bitx40 smd kits.


.jpg)

1 comment:
Hello,
Where can I buy the analog meter that fits in that case?
Best, John KB1YFD jwbav8r@gmail.com
Post a Comment